

Manual 2 · Chapter 8
Daily management
Releasing stuck work#
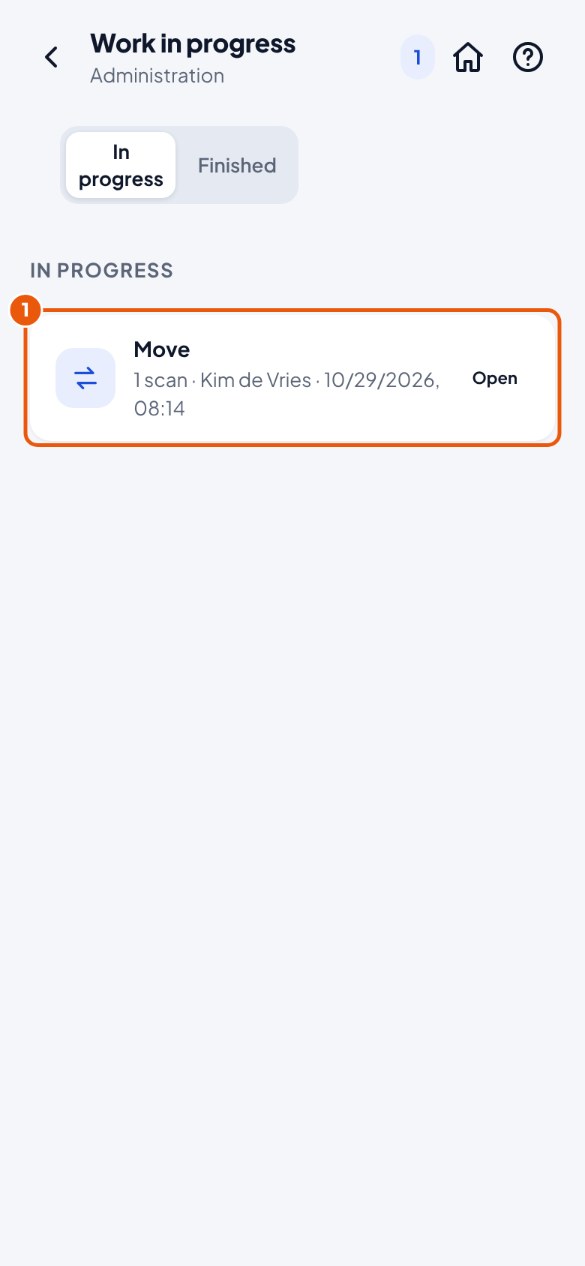
Sometimes a posting stays on "Posting…", for example when the server was briefly down. This is how you free it again:
- Go to Administration → Work in progress and tap the work that is stuck 1.
- Tap Release. The employee can now post again; KoonScan first checks in SAP whether it was already posted, so nothing is posted twice.
- Do you want to throw the work away without posting? Tap Close without posting and confirm.
Changing a setting#
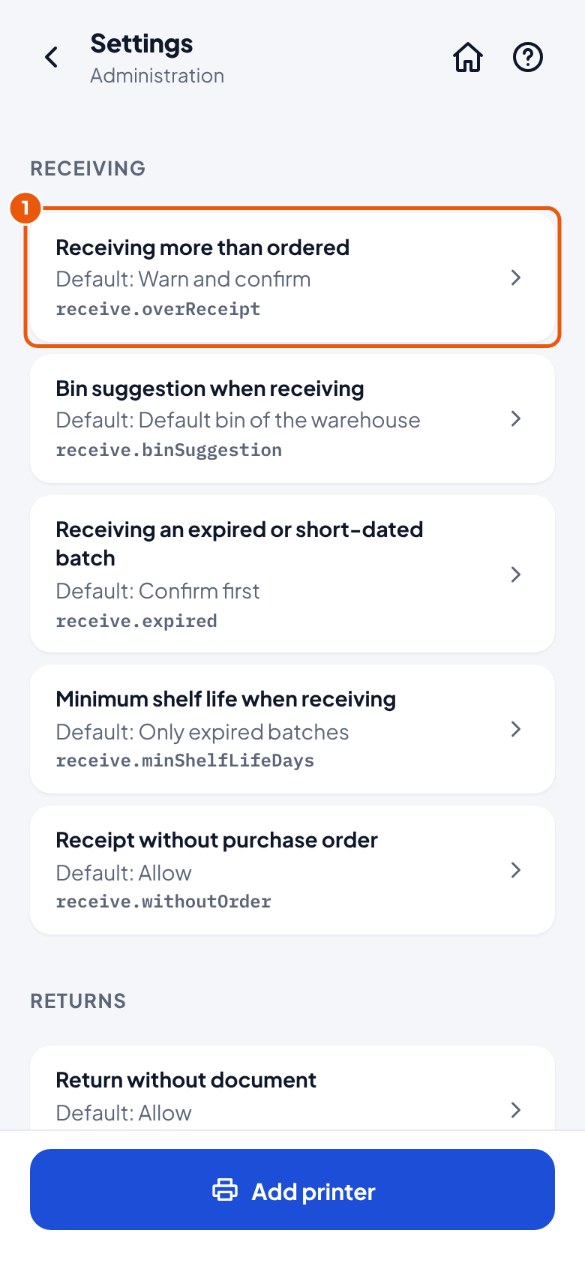
For example: may an employee receive more than was ordered?
- Go to Administration → Settings and tap the setting, for example Receiving more than ordered 1.
- Choose the new value. Changed your mind? Choose Back to default.
All settings with an explanation are in appendix A at the back.
Watching expiry dates (FEFO)#
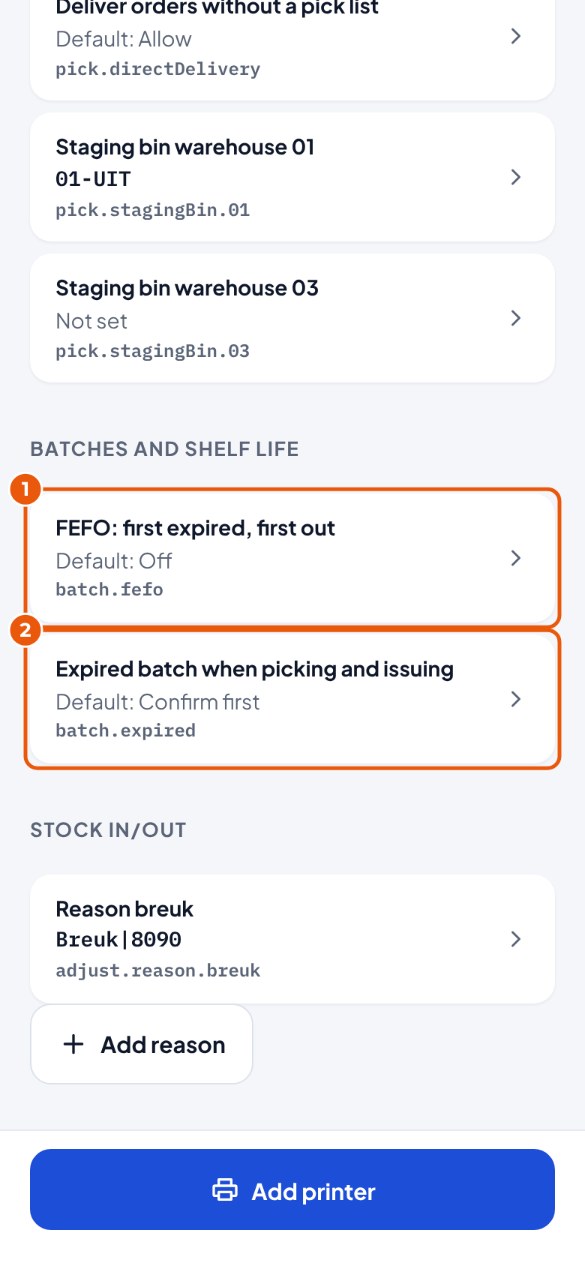
First expired, first out. FEFO is off by default; an expired batch does already ask for confirmation.
- Go to Administration → Settings → group Batches and shelf life and tap FEFO: first expired, first out 1. Choose Confirm first (the employee may still take another batch) or Refuse (only the oldest batch).
- Tap Expired batch when picking and issuing 2 and choose Allow, Confirm first (default) or Refuse.
- Under Receiving you set what happens with a batch that has already expired or has too short a shelf life, and how many days it must still be good for at least.
Setting the default customer for the counter#
Does your warehouse sell at the counter to walk-in customers? Then set, per warehouse, the customer that KoonScan chooses by itself.
- In SAP, create a customer for the counter, for example "Counter customer", with the price list that applies at the counter. Note the customer code.
- Go to Administration → Settings. Under Sales, tap Default counter customer warehouse … for the warehouse with the counter.
- Type the customer code and tap Save. If it is not an active customer in SAP, KoonScan warns you.
Photos: the attachments folder in SAP#
Employees can take photos (for example of damage) with a receipt or return. They go to SAP as an attachment. For that, SAP needs a folder for attachments that the Service Layer is allowed to write to. You set this up once; ask your SAP partner if you are not sure.
- Open SAP Business One. Go to Administration → System Initialization → General Settings, Path tab.
- Look at Attachments Folder. Is there already a folder (for example \\server\B1_SHF\Attachments)? Then you do not have to change anything here. Empty? Choose a shared folder and click Update.
- Give the Service Layer write permission on that folder. On Windows the Service Layer runs as Network Service: right-click the folder → Properties → Security → Edit → Add → type NETWORK SERVICE → tick Modify → OK.
- In KoonScan: Administration → Settings → Photos. Photos when receiving and with returns are on by default, at most 10 per document. You can also switch them off here.
Adding a network printer for labels#
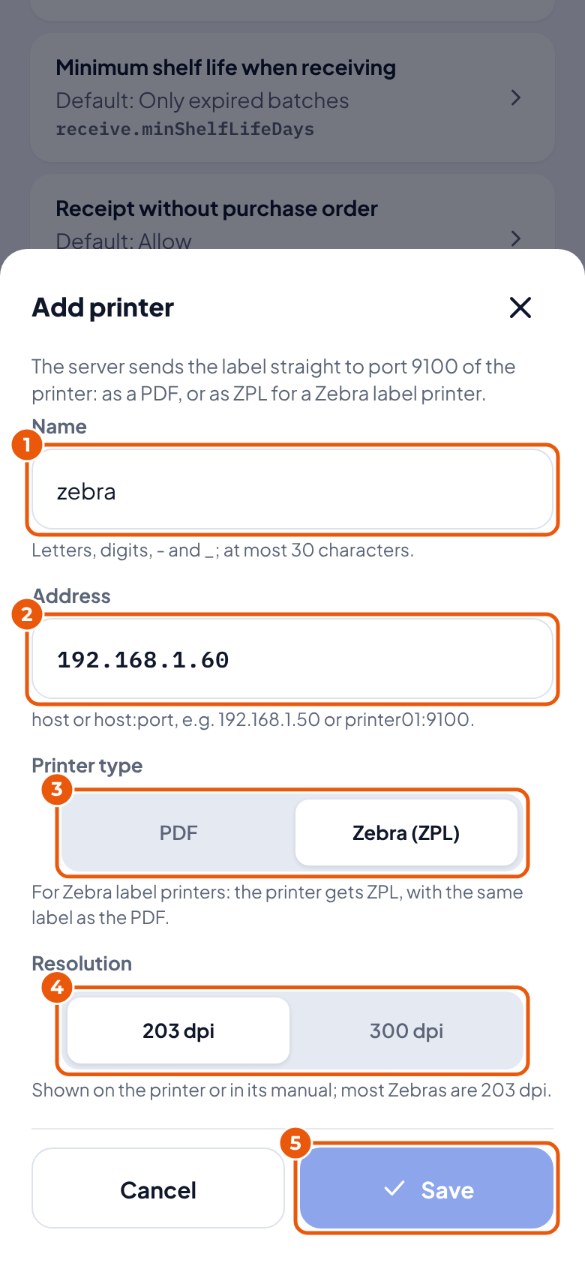
Go to Administration → Settings and, at the bottom under Network printers, tap Add printer.
- Type a Name 1, for example "warehouse" or "zebra".
- Type the Address of the printer 2, for example 192.168.1.50. If needed, ask your IT supplier for the address.
- Choose the Printer type 3: PDF for an ordinary printer that can print PDF, Zebra (ZPL) for a Zebra label printer.
- For a Zebra: choose the Resolution 4 (it says on the printer; usually 203 dpi).
- Tap Save 5.
Who did what? (log)#
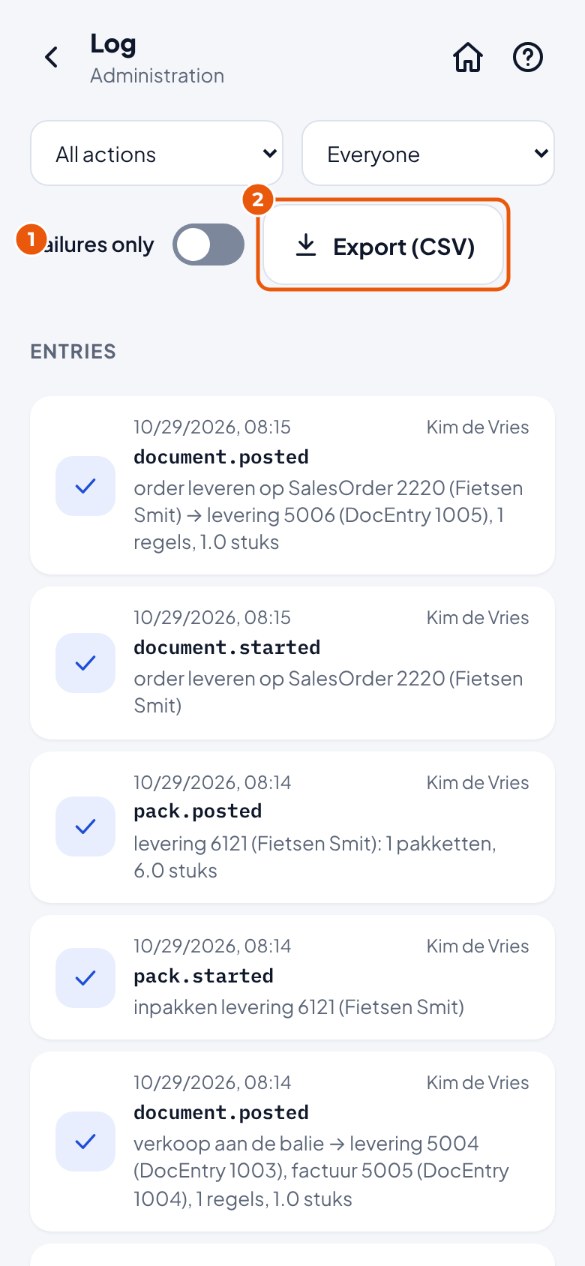
Administration → Log shows everything that happened: signing in, postings with the SAP number, failed postings with the message, changes.
- Go to Administration → Log. Switch on Failures only 1 to find problems, or choose an action or user.
- Do you want to look at it in Excel or keep it? Tap Export (CSV) 2. The file contains the lines with the same choices as on the screen, newest first. Headings and details are in the language of the app; lines from before the five languages appear as they were stored.
- Open the file (Downloads folder) with Excel: the columns are right straight away.
Changing the SAP password or the server#
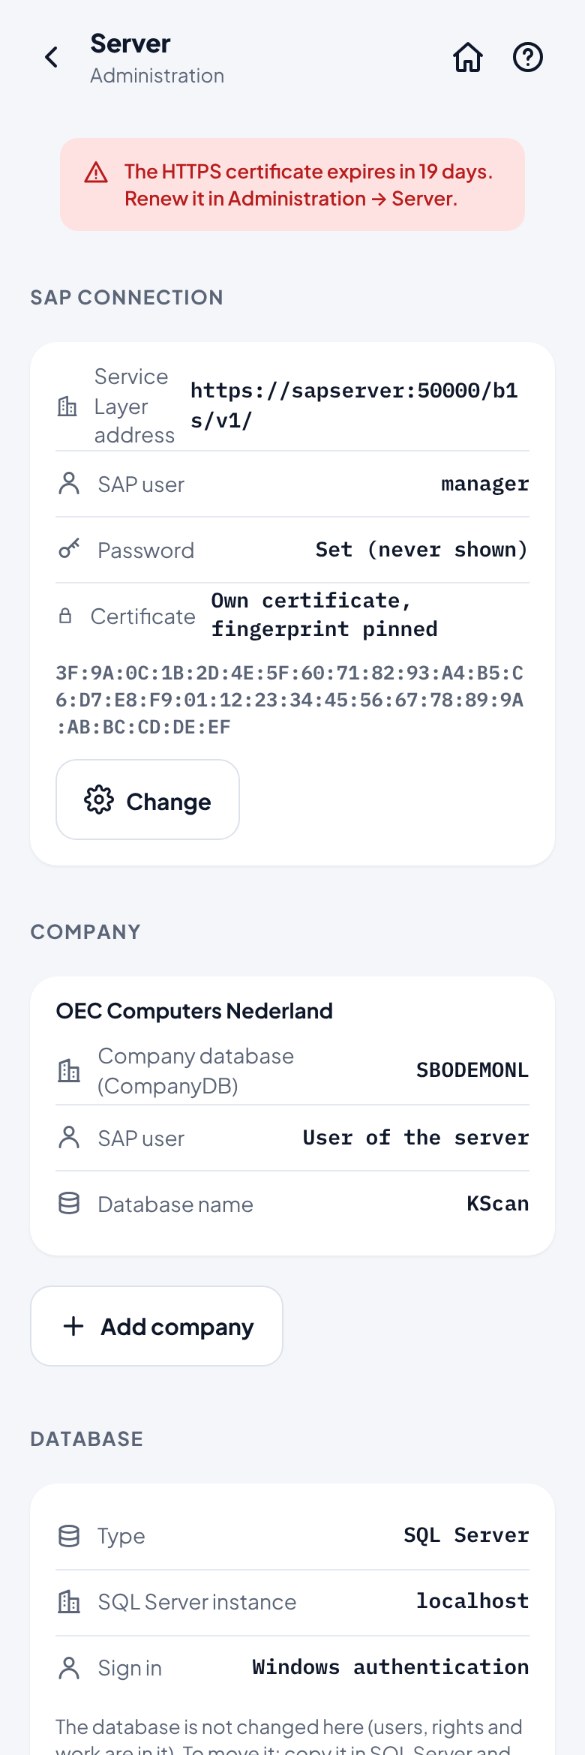
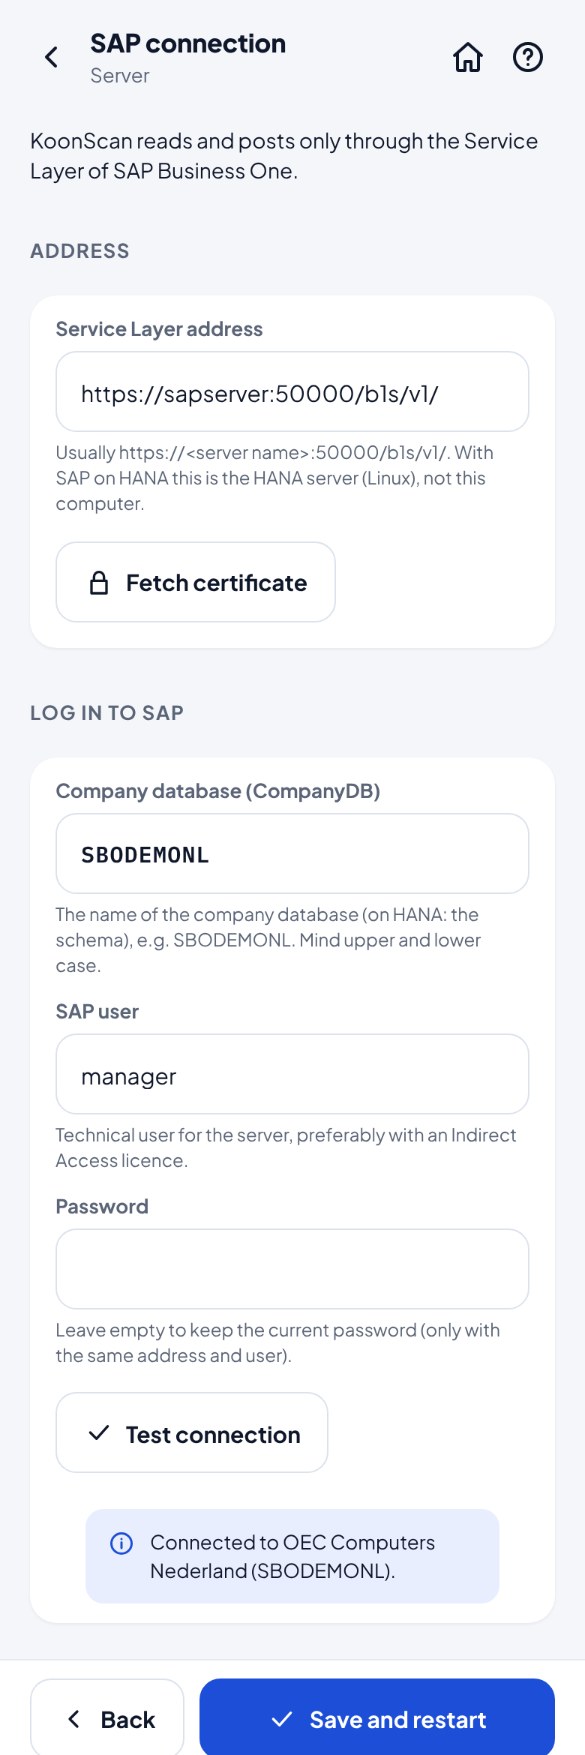
- Go to Administration → Server and choose what you want to change (for example SAP connection if the password of the SAP user has changed).
- Change it and test (just like in the wizard).
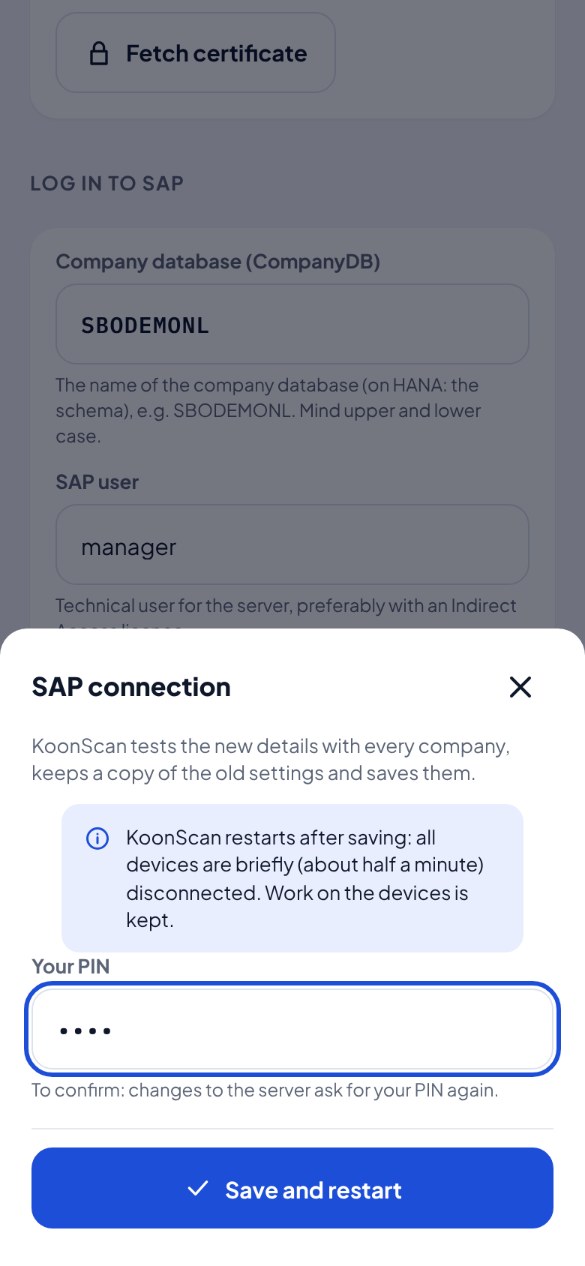
- Confirm with your PIN. KoonScan restarts: all devices are gone for about half a minute; their work is kept.
Adding a second SAP company#
One KoonScan server can serve several SAP companies. Each company gets its own database with its own users and work; employees choose the company when signing in.
- Go to Administration → Server and tap Add company.
- Fill in Code in the app, Name and Company database (CompanyDB) of the new company. Does this company use another SAP user? Switch on Own SAP user for this company and fill it in; otherwise KoonScan uses the user of the server.
- Check the database with Test, and choose under Employee who becomes the administrator of the new company (usually yourself).
- Tap Test the connection first. Correct what the message says until the test succeeds.
- Tap Add and restart and confirm with your PIN. KoonScan creates the database for the new company with you as administrator and restarts (about half a minute).