
Manual 3 · Chapter 4
Receiving against a purchase order
A delivery arrives from a supplier. You scan what comes in and post it in SAP as a goods receipt.
Choosing an order#
- Tap the Receiving tile.
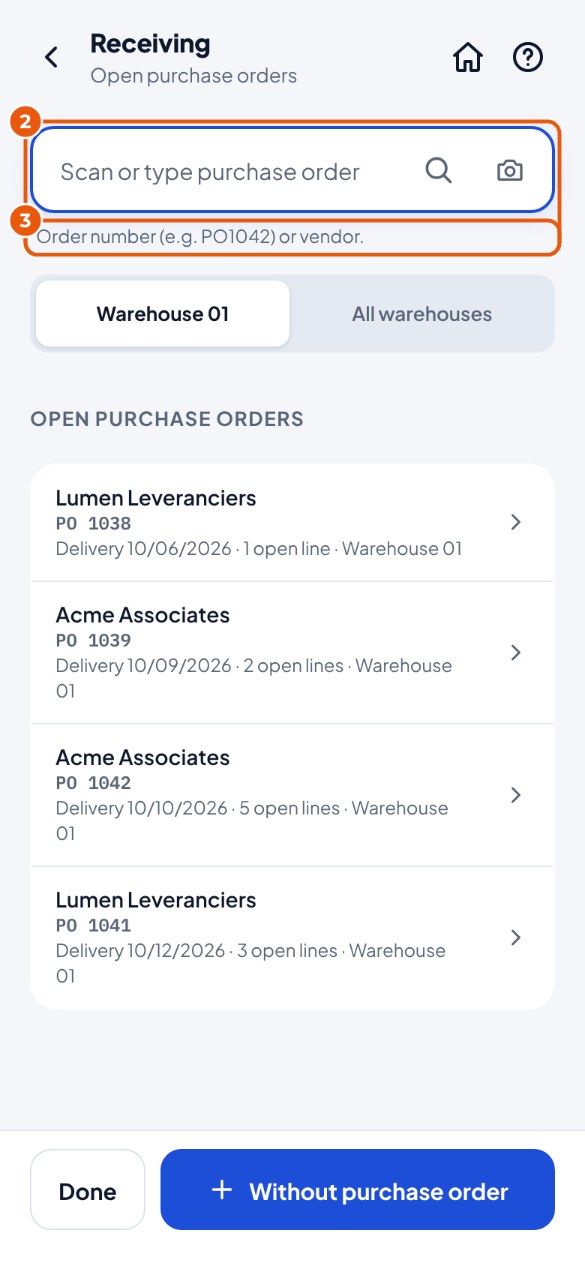
- Scan the order number 2 (for example from the delivery note), or tap the order in the list 3.
Receiving items and posting#
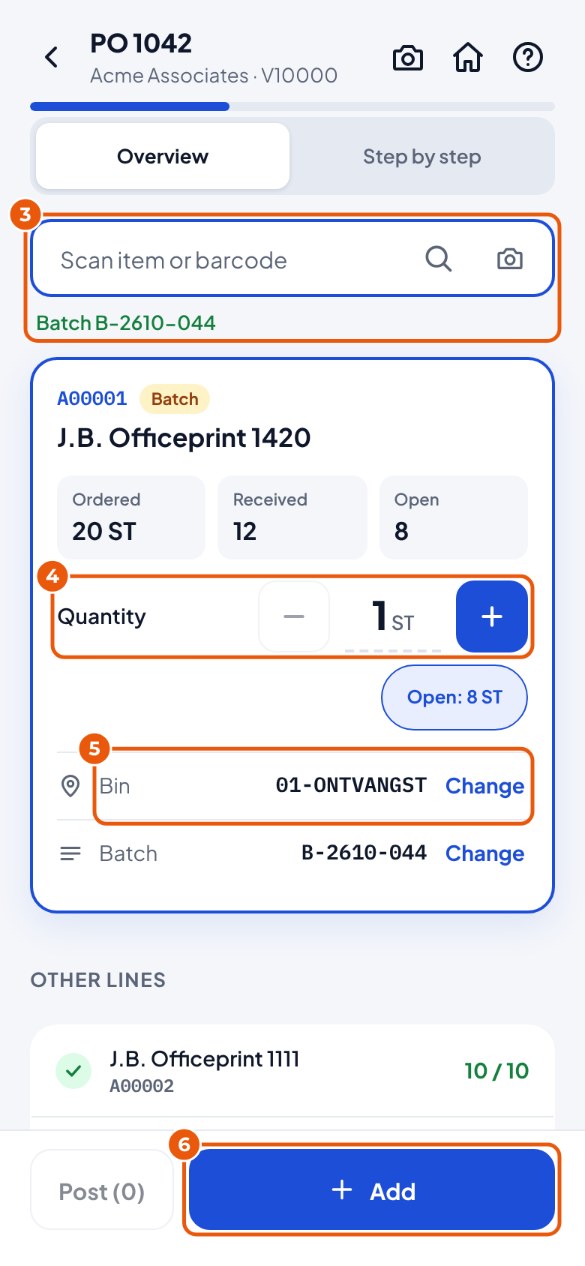
- Scan the item 3. Scanning it again adds one more. Scanning a whole box counts in boxes.
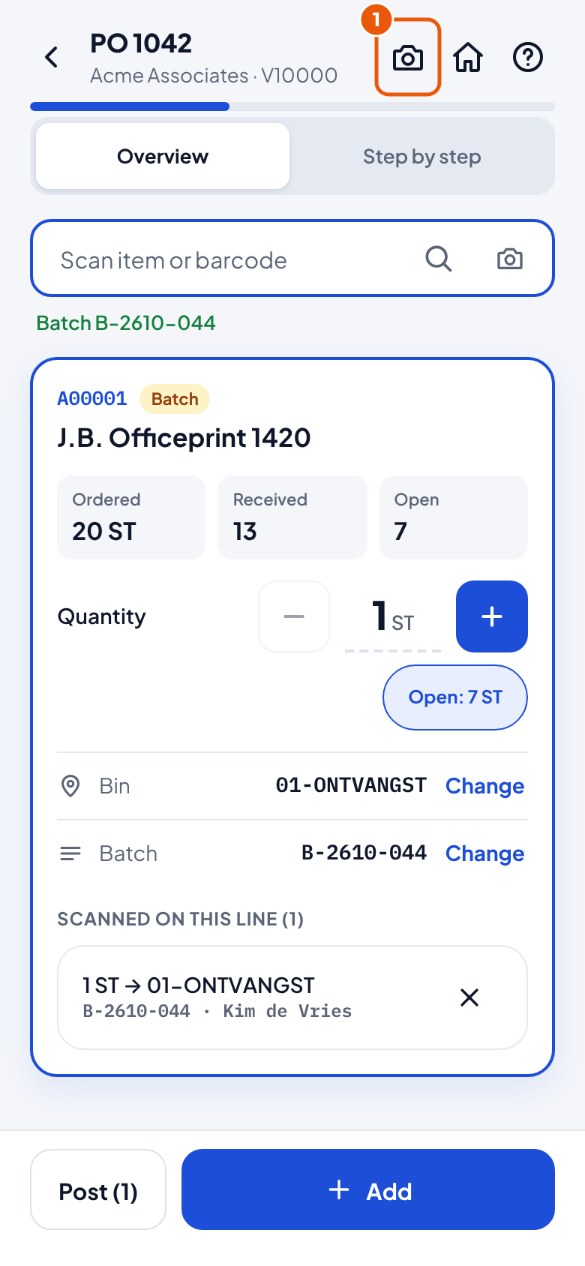
- Is the quantity right? Change it with − and + 4, or tap the number and type it. Open: … fills in everything that is still open in one go.
- Check the bin location 5. Put it somewhere else? Then scan that bin location. For a batch item: scan or type the batch.
- At the bottom, tap Add 6. Do steps 3 to 6 for every item.
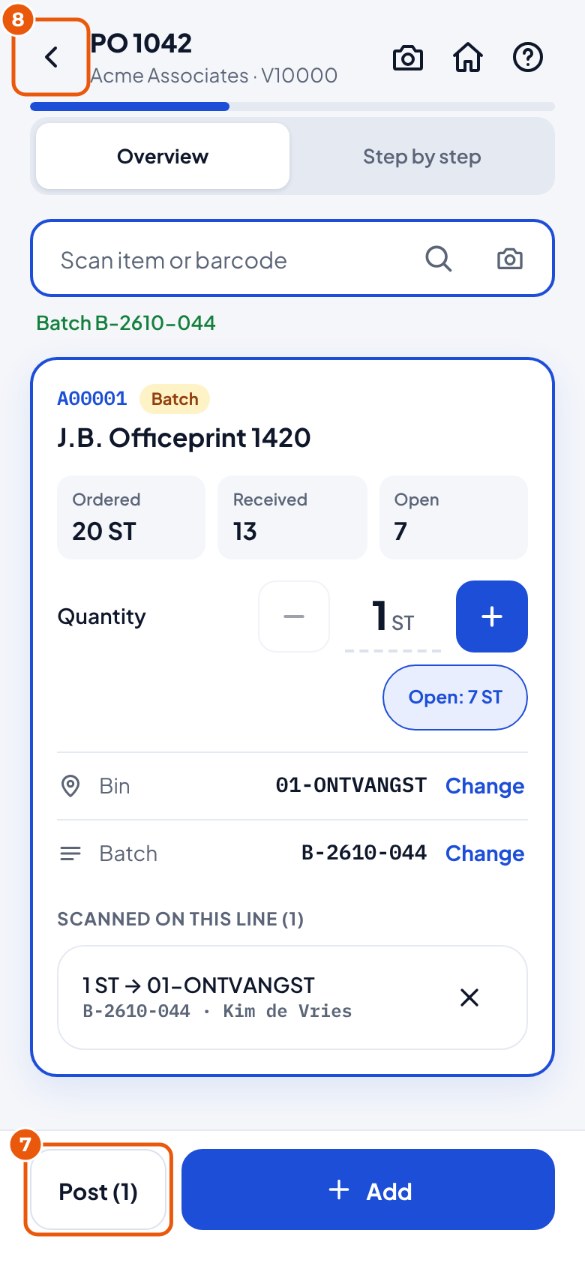
- Everything scanned? Tap Post 7 (with an item on screen it briefly says "Post (1)", otherwise "Post to SAP").
- Not finished yet? Tap Back at the top left 8: your work is kept.
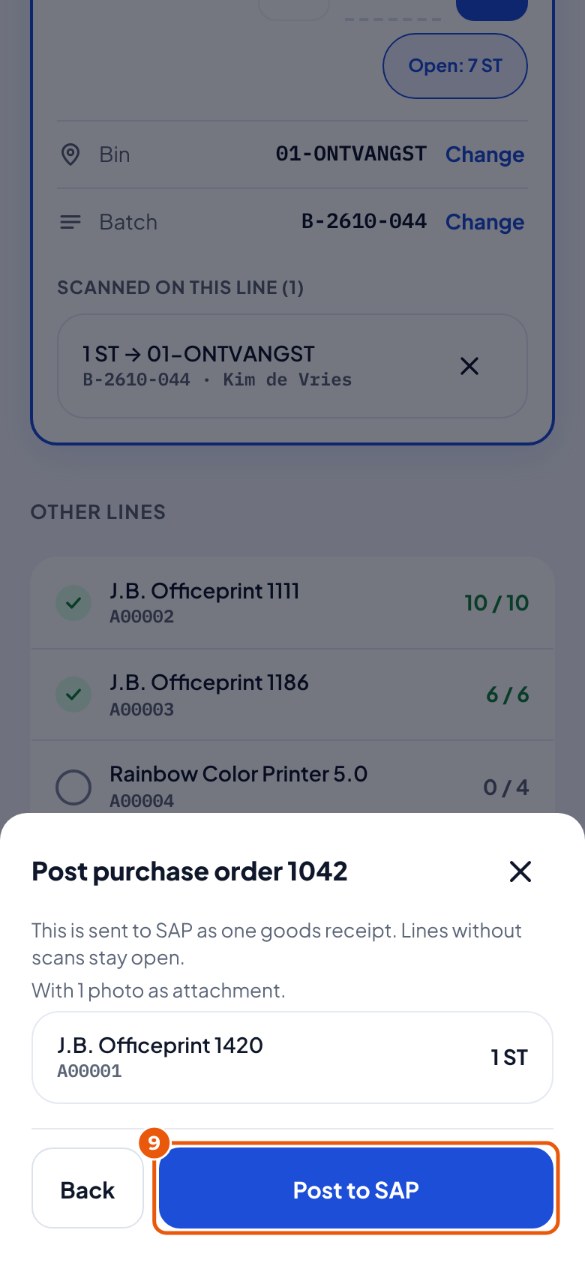
- Check what is being posted and tap Post to SAP 9.
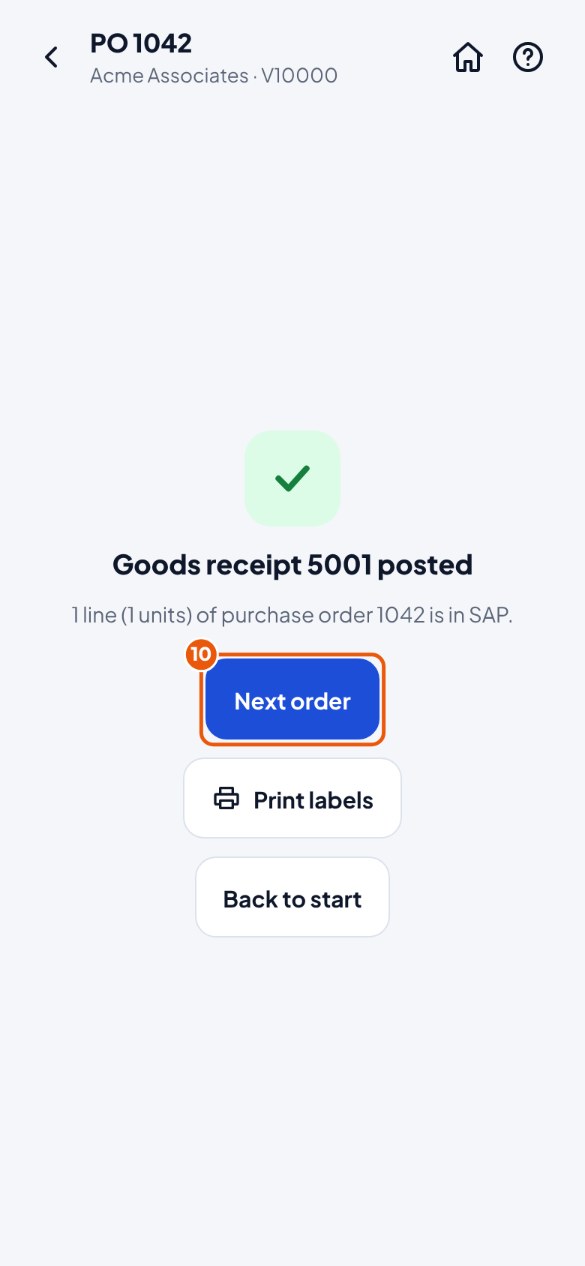
- Done: the receipt is in SAP. Tap Next order 10, or print labels straight away with Print labels.
Taking photos (for example of damage)#
Did something arrive broken? Take a photo. The photo goes to SAP with the posting, as an attachment to the receipt. This also works for a receipt without a purchase order and for returns.
- First scan at least one item. Then tap the camera 1 at the top right. The number on it is the number of photos.
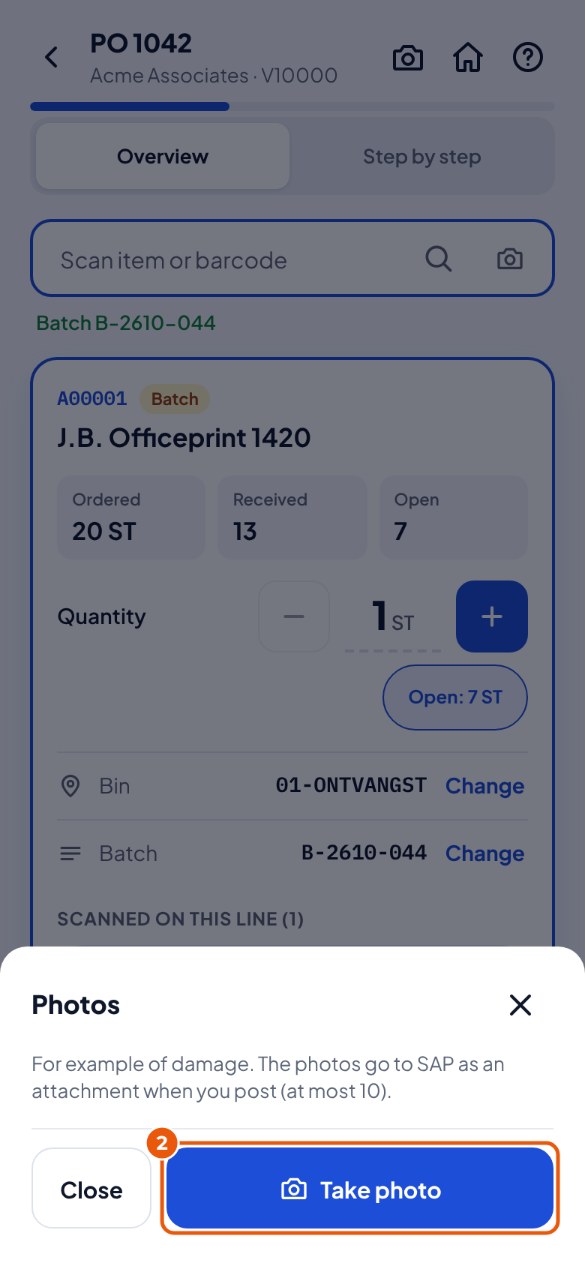
- Tap Take photo 2.
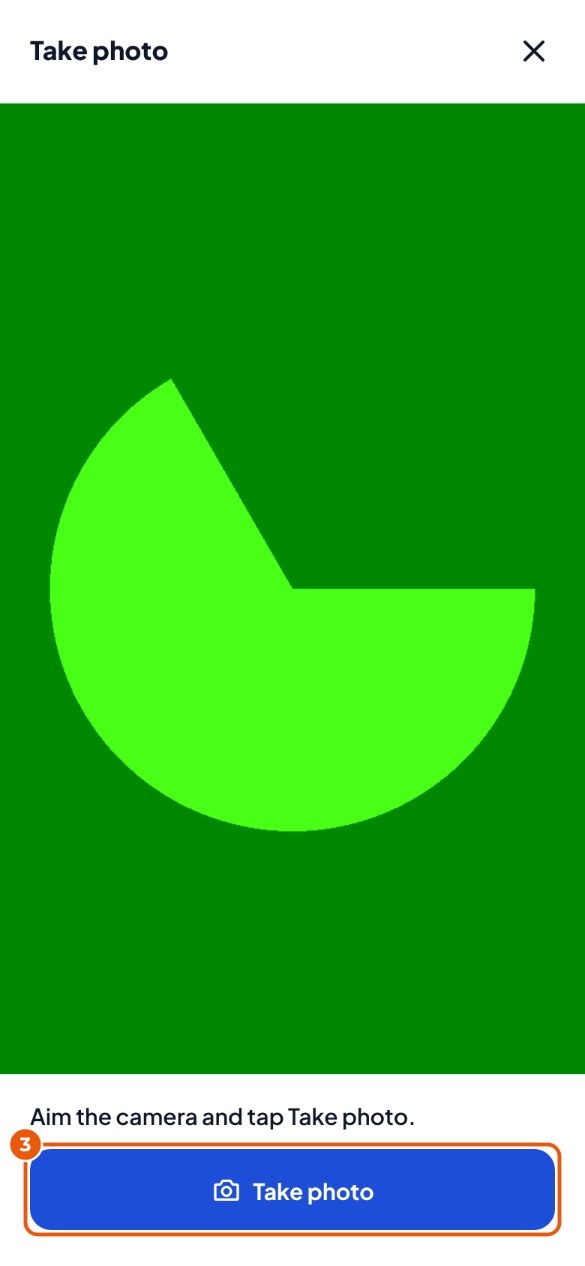
- Aim the camera at the damage and tap Take photo 3.
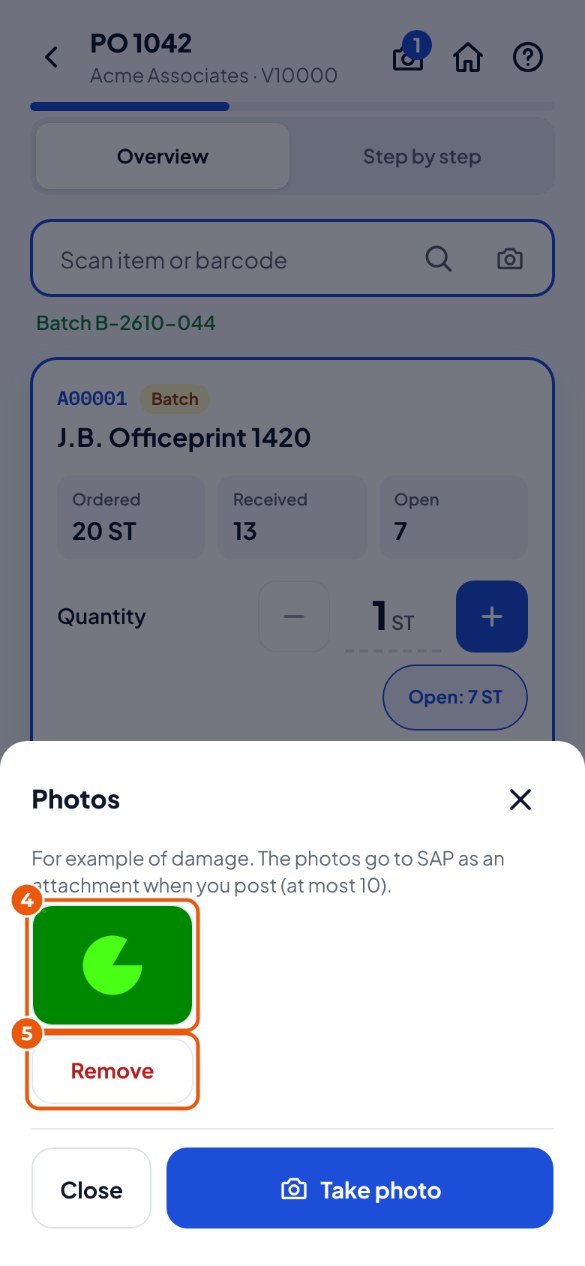
- The photo is now in the list 4. Another photo? Tap Take photo again. Did it go wrong? Tap Remove 5.
- Tap Close and post as usual with Post to SAP. The posting panel says how many photos go with it.
Entering extra details#
Has your administrator set up extra fields (for example the carrier or an inspection code)? Then you fill them in in KoonScan; they go to SAP with the posting. This works the same way for every function.
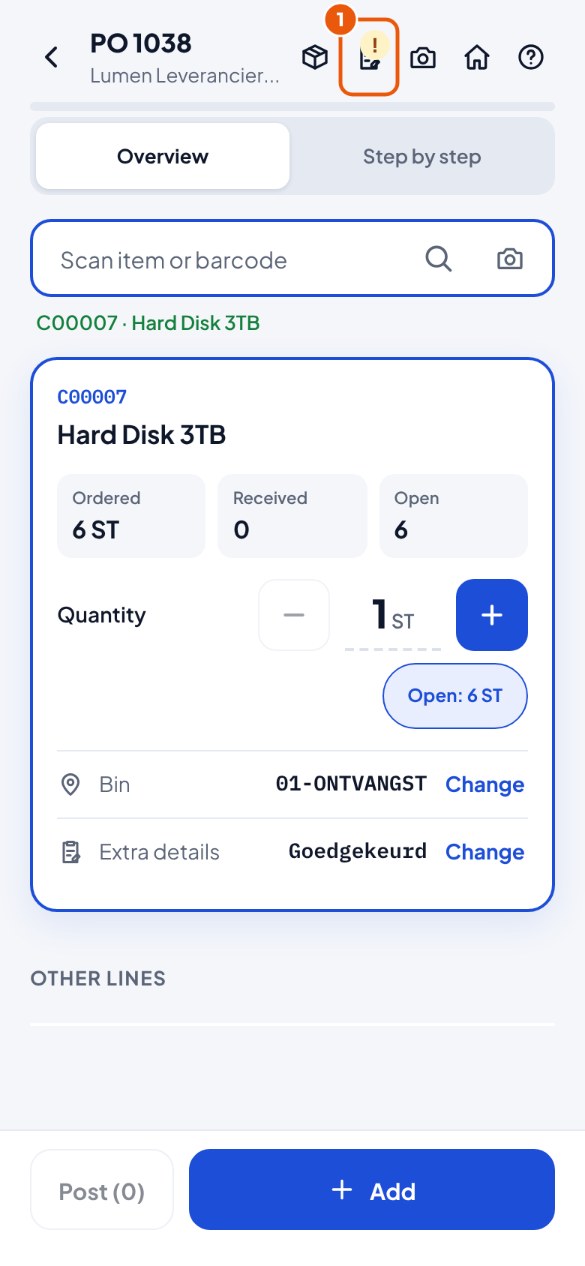
- Details of the whole document (once): tap the button with the form 1 at the top right. Is there a ! on it? Then something still has to be filled in.
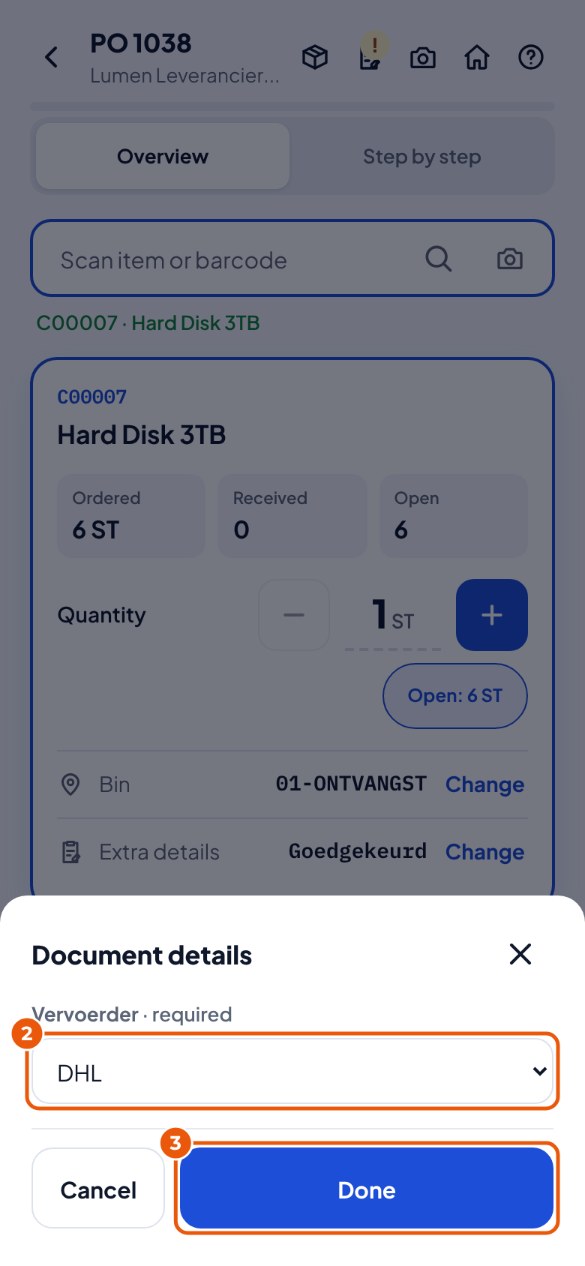
- Fill in the fields 2. A field marked "required" must be filled in. Tap Done 3.
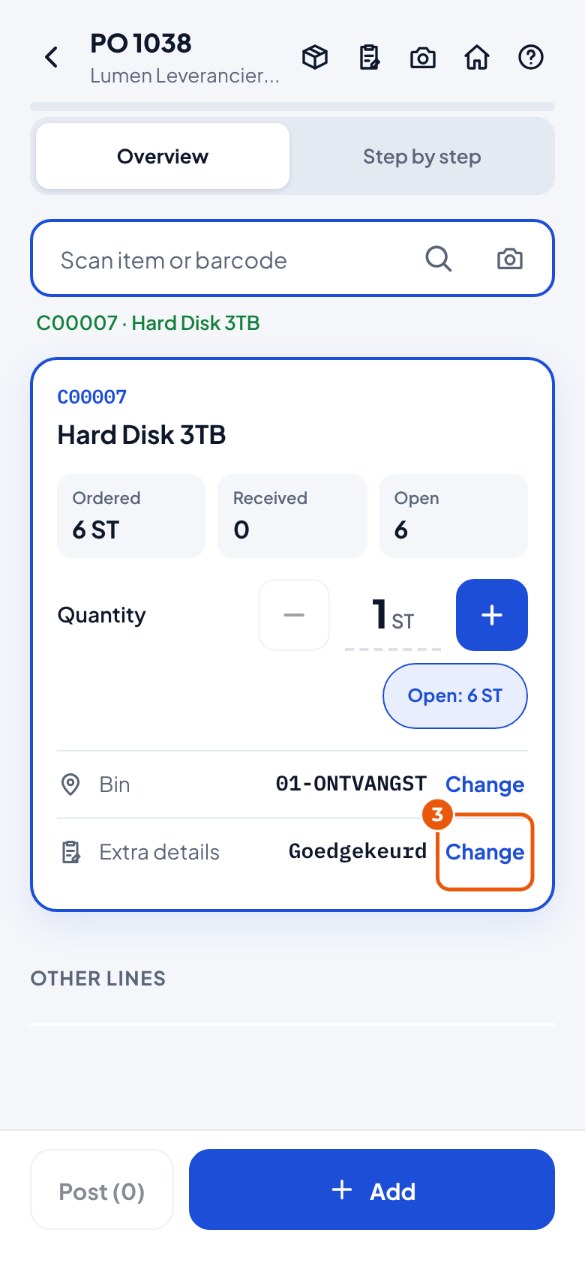
- Details per item: the item card has Extra details. Tap Change 3, fill them in and tap Done. The values stay for the next scans of the same item.
A message from a custom check#
Your administrator can set up custom checks, for example "item blocked for purchasing". There are two kinds:
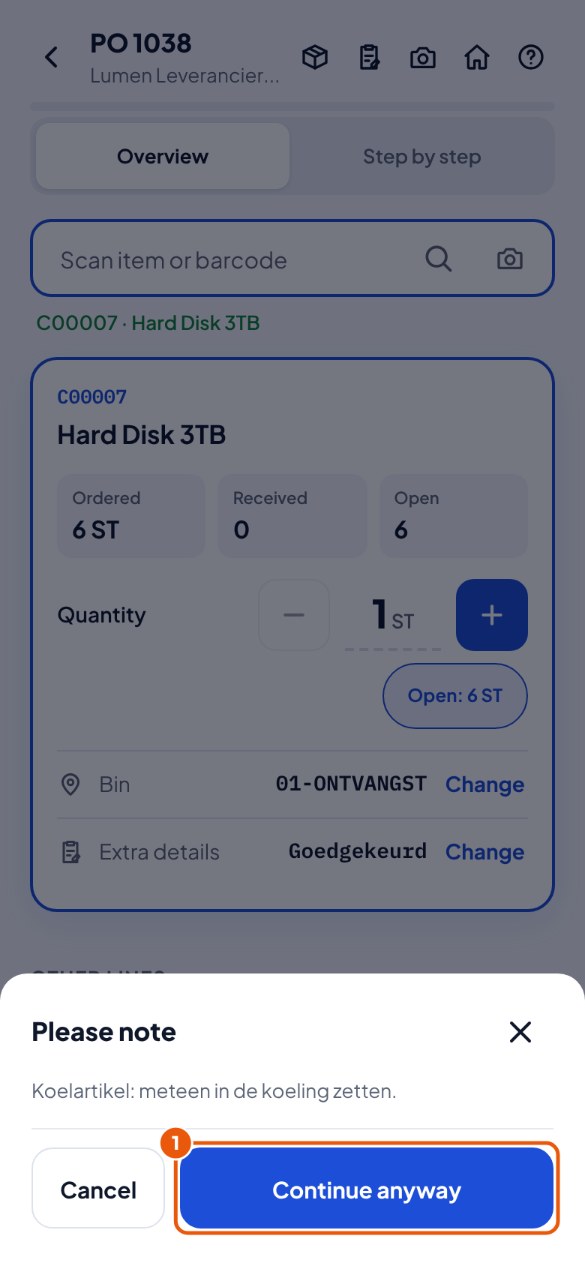
- Please note with Continue anyway 1: read the message. Is it right after all? Tap Continue anyway; that goes in the log with your name. Otherwise: Cancel.
- A red message without Continue anyway: this is not allowed; the scan or posting does not go ahead. Does it say "Check … is not working; please tell your administrator"? Then tell the administrator; your work is kept.