
Manual 2 · Chapter 3
Connecting KoonScan to SAP (the wizard)
The setup wizard opens by itself after the installation. It has eight steps; at the top you see where you are (for example "2 / 8"). Nothing is saved until the last step.
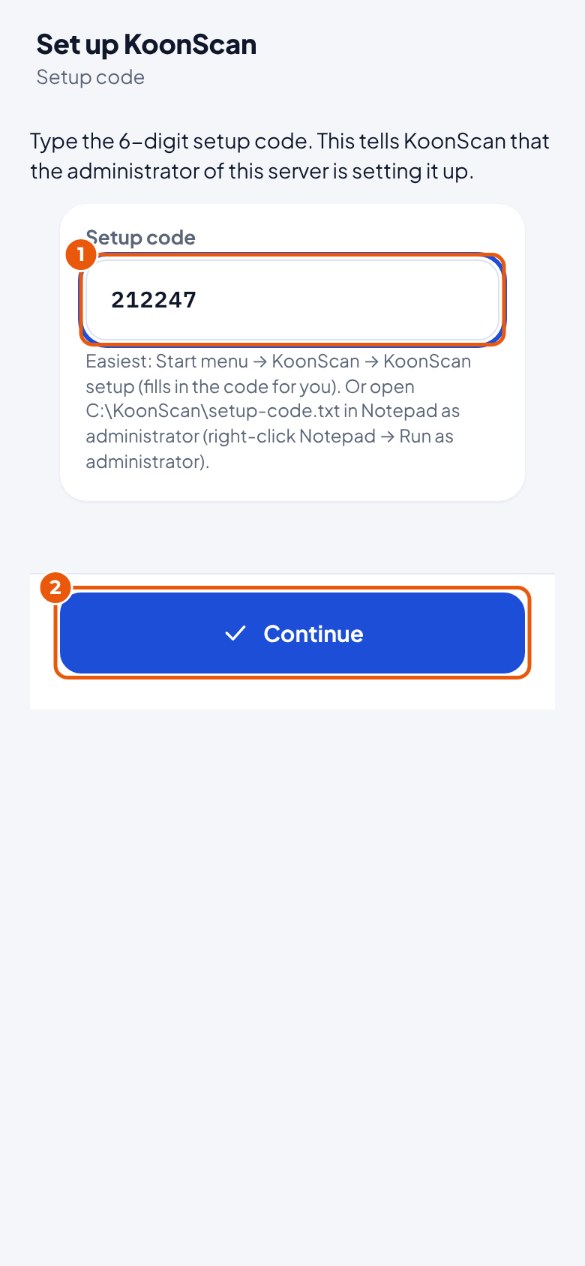
Setup code (only if it is asked for)#
The wizard asks for a setup code if you open it in another way, for example through KoonScan administration or in another browser. You do not have to type the code:
- Close the browser.
- Open Start menu → KoonScan → KoonScan setup.
- Windows asks whether the app may make changes. Click Yes. The wizard opens with the code already filled in.
Do you want to type the code yourself after all? The code is in C:\KoonScan\setup-code.txt. That file is for administrators only: double-clicking does not work ("Access is denied").
- Click Start and type Notepad.
- Right-click Notepad and choose Run as administrator. Click Yes.
- In Notepad, choose File → Open, type
C:\KoonScan\setup-code.txtand click Open.
- Type the 6 digits in the box 1.
- Click Continue 2.
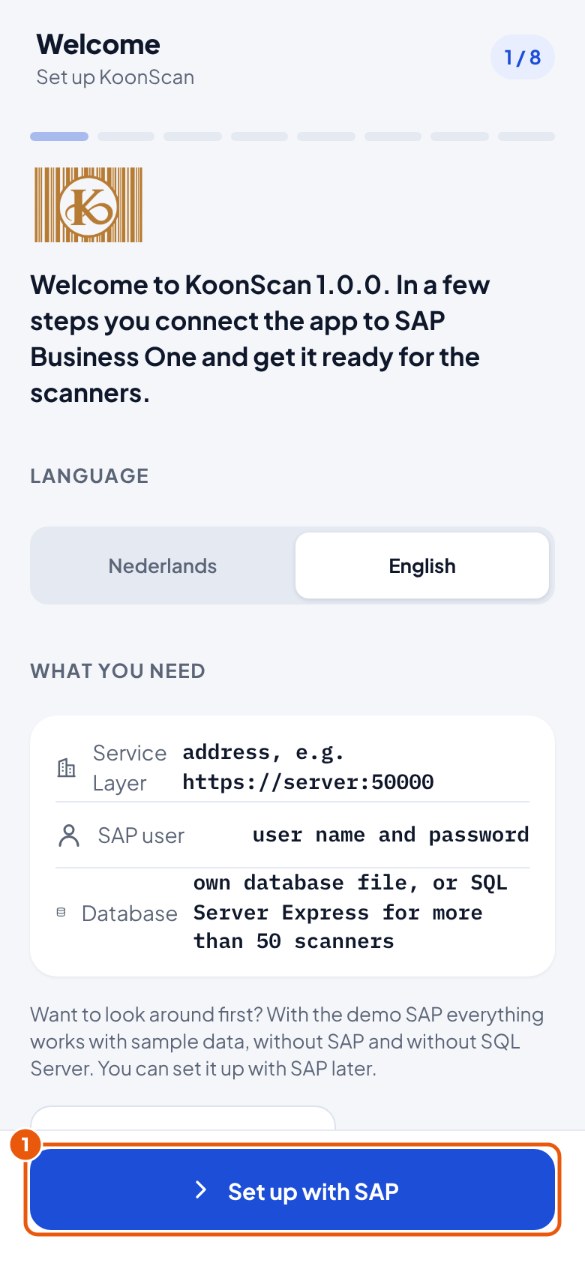
Step 1 · Welcome#
- Click Set up with SAP 1.
Step 2 · SAP#
- At Service Layer address 1 type the address from your data sheet. Often the right address is already there.
- Click Fetch certificate 2.
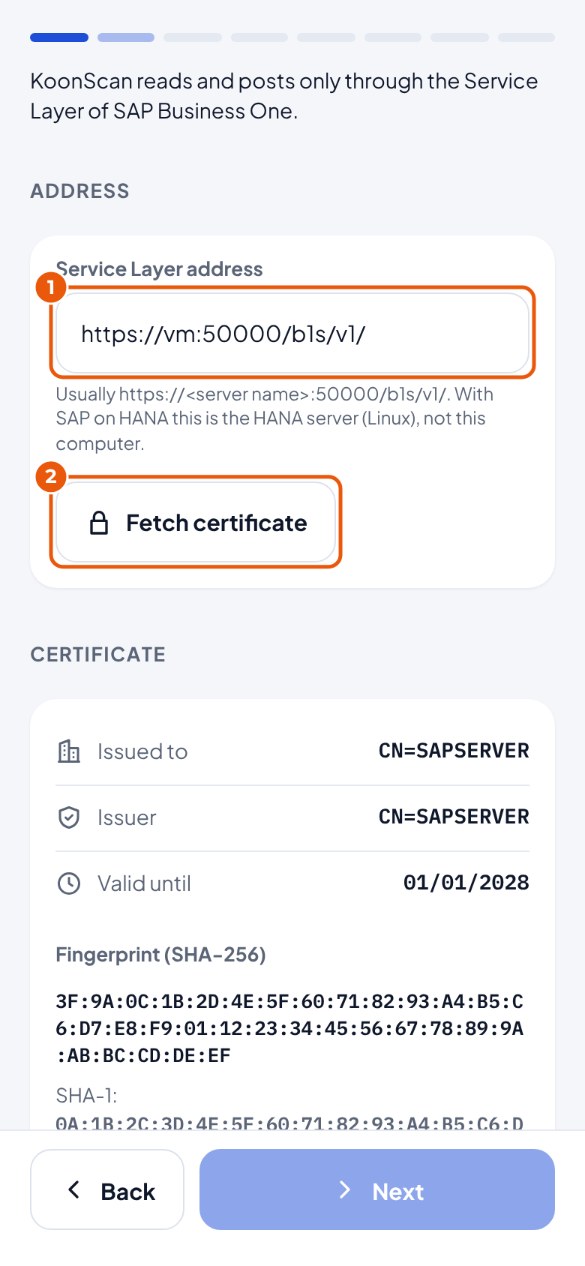
- A fingerprint 3 appears: a long series of letters and numbers. Ask your SAP partner whether it is correct.
- Is it correct? Switch on the toggle Fingerprint checked: trust this certificate 4.
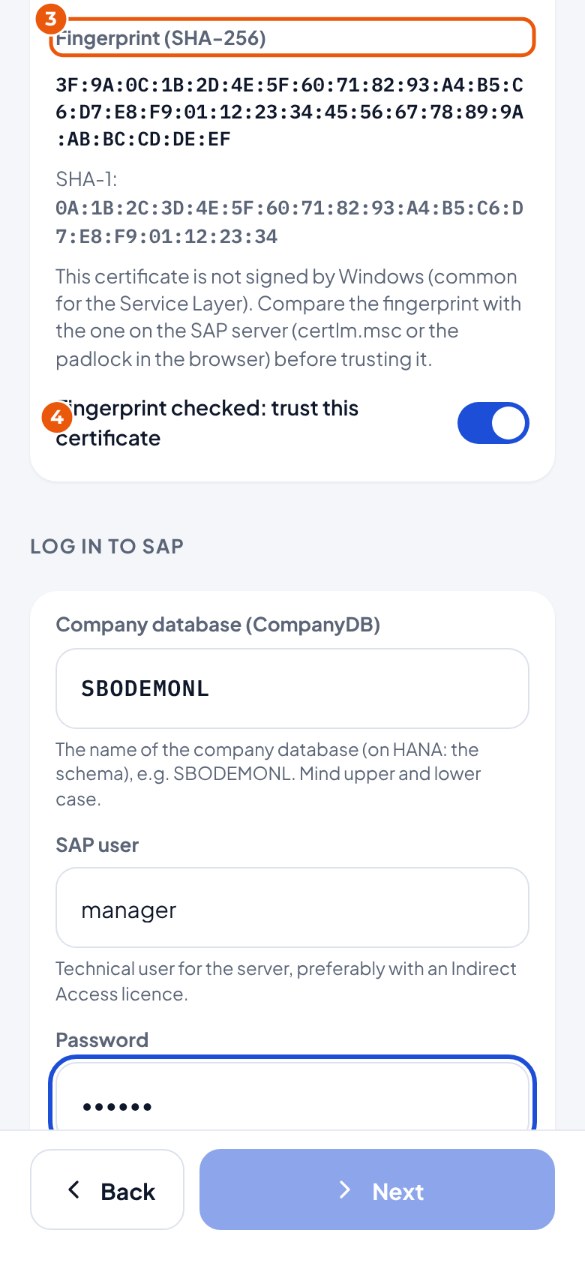
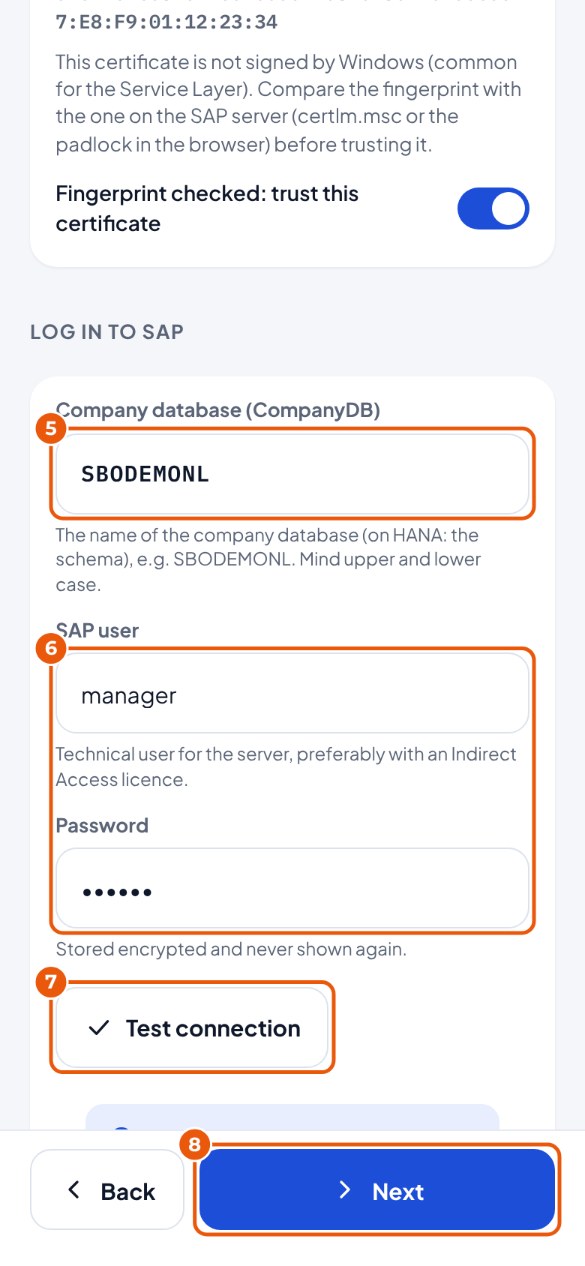
- At Company database (CompanyDB) 5 type the database name from your data sheet. Mind the upper and lower case.
- At 6 fill in the SAP user and the Password.
- Click Test connection 7. After a few seconds it says in green "Connected to …" with the name of your company.
- Click Next 8.
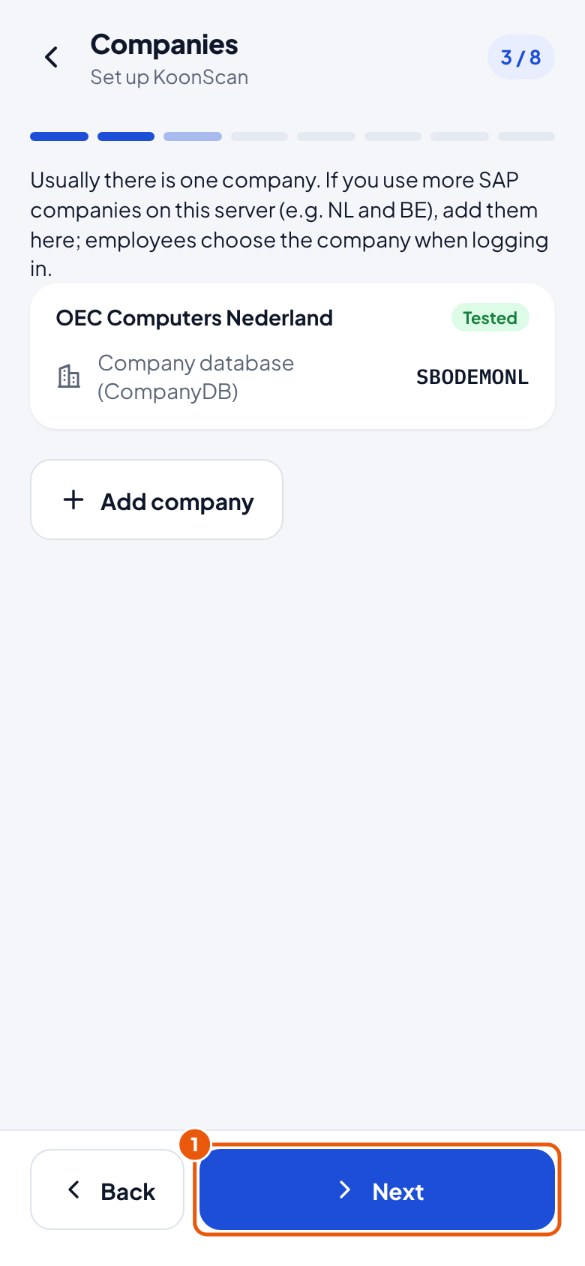
Step 3 · Companies#
- Do you use one SAP company (usually the case)? Then click Next 1. (If you work with more companies, add them with Add company; each company is tested.)
Step 4 · Database#
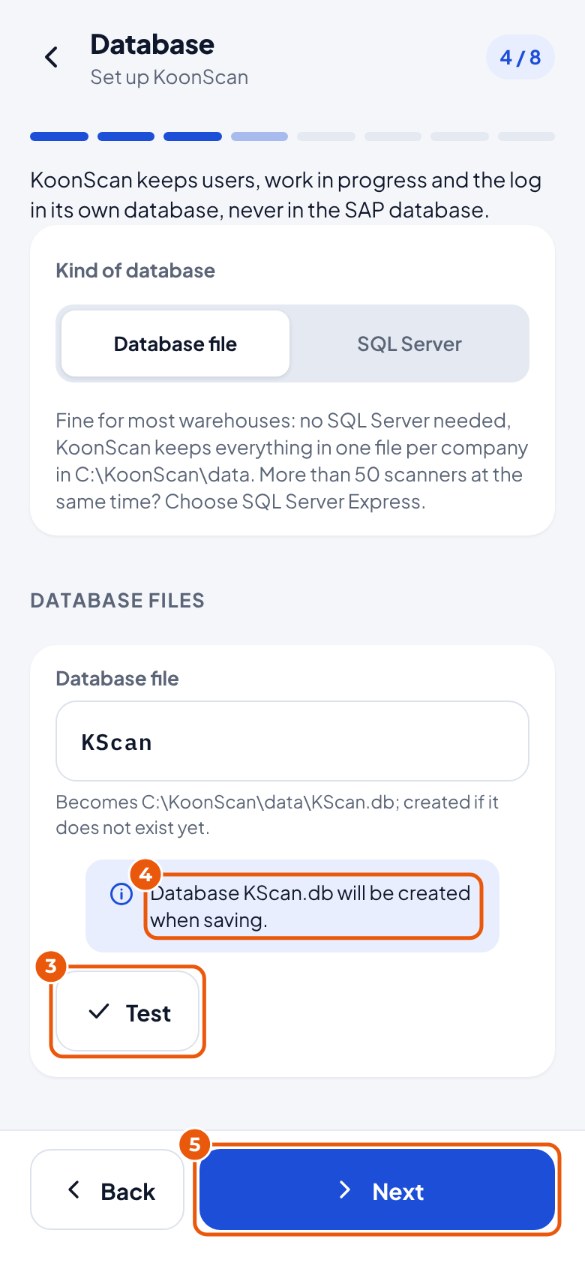
- Leave Database file 1 selected. KoonScan then keeps its data in one file per company in
C:\KoonScan\data; no SQL Server needed. - At Database file 2 it says KScan. Leave it as it is: the file becomes
C:\KoonScan\data\KScan.db. (With more companies, each company gets its own name, for example KScan_NL.)
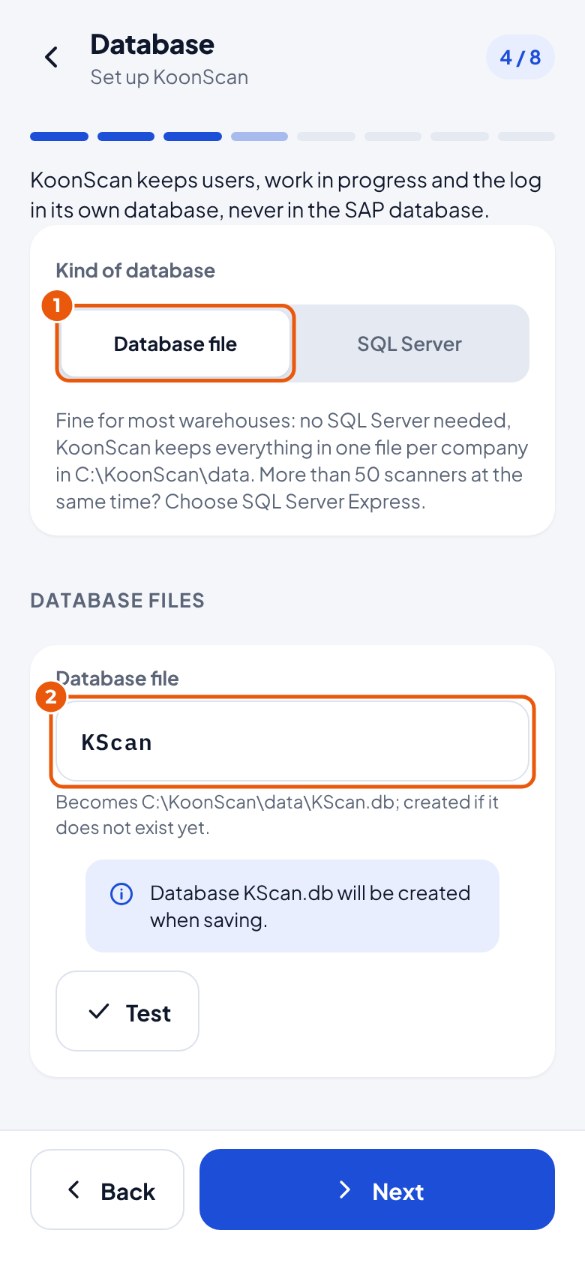
- Click Test 3.
- It says "Database KScan.db will be created when saving" 4 (or "already exists"). That is fine.
- Click Next 5.
Step 5 · HTTPS (for handheld scanners and phones)#
- Click Create certificate 1. (After that the button is called "Create again".)
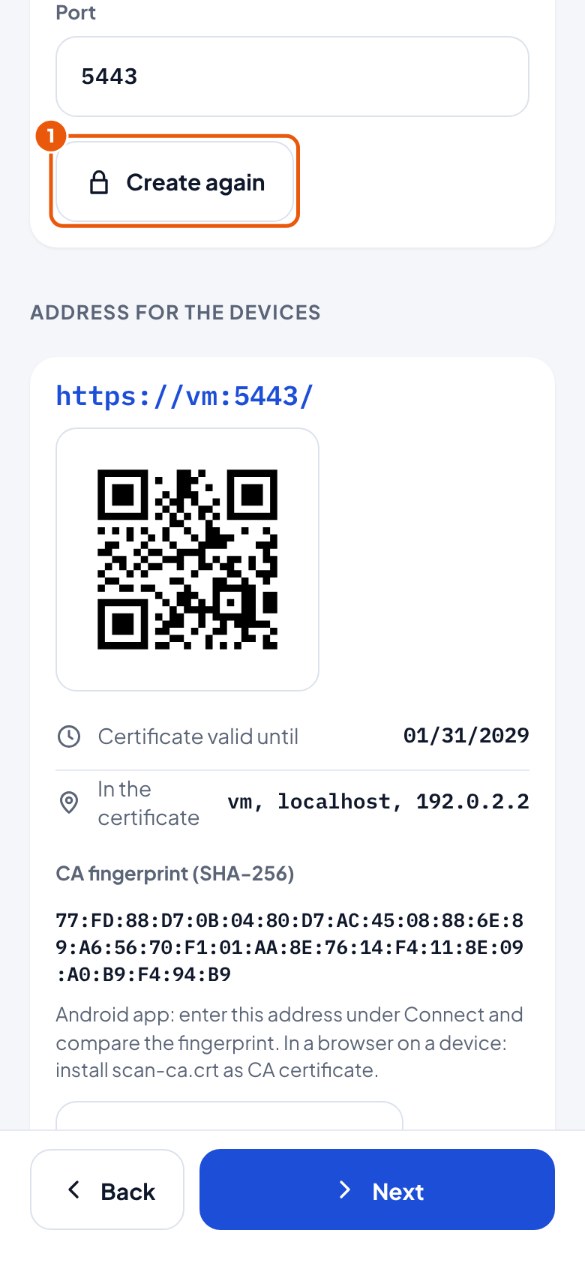
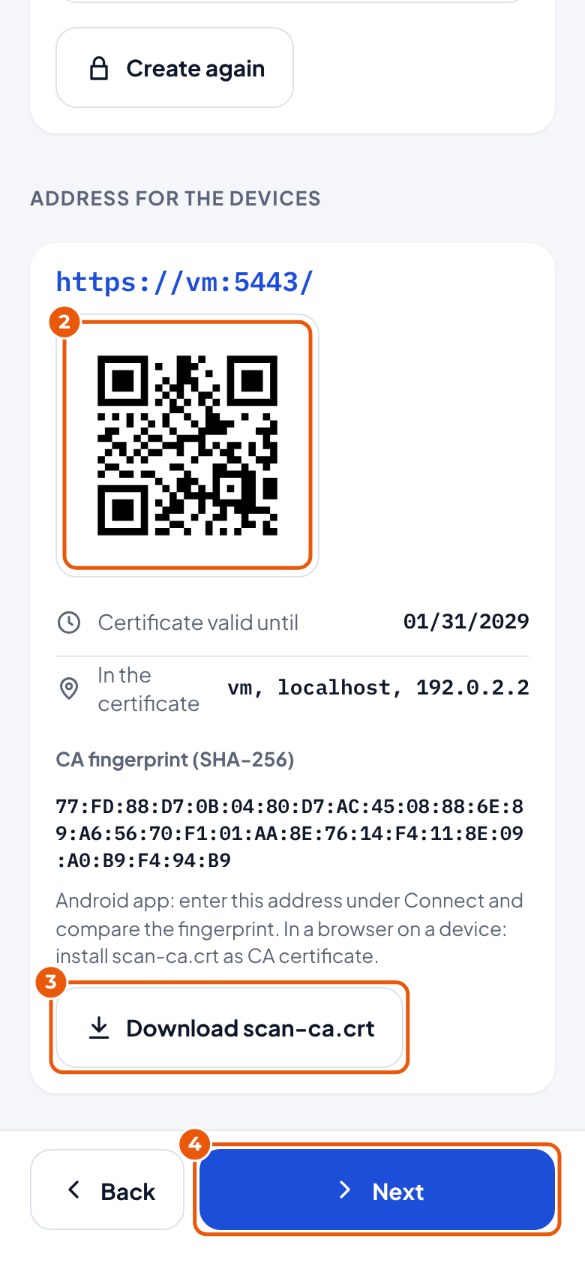
- You see the Address for the devices and a QR code 2. Write the address down; you need it in chapter 7.
- Do you use phones with a browser (not the Android app)? Then click Download scan-ca.crt 3 and save the file.
- Click Next 4.
Step 6 · First administrator (you)#
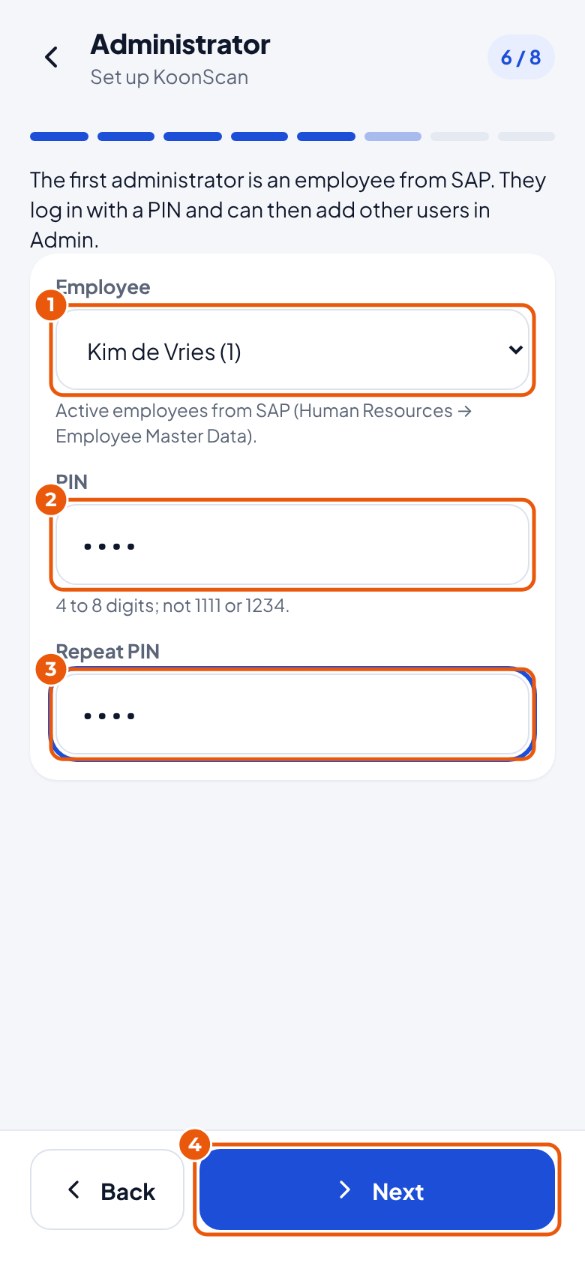
- At Employee 1 choose your own name from the list (the list comes from SAP).
- At PIN 2 type your PIN (4 to 8 digits).
- Type the same PIN again at Repeat PIN 3.
- Click Next 4.
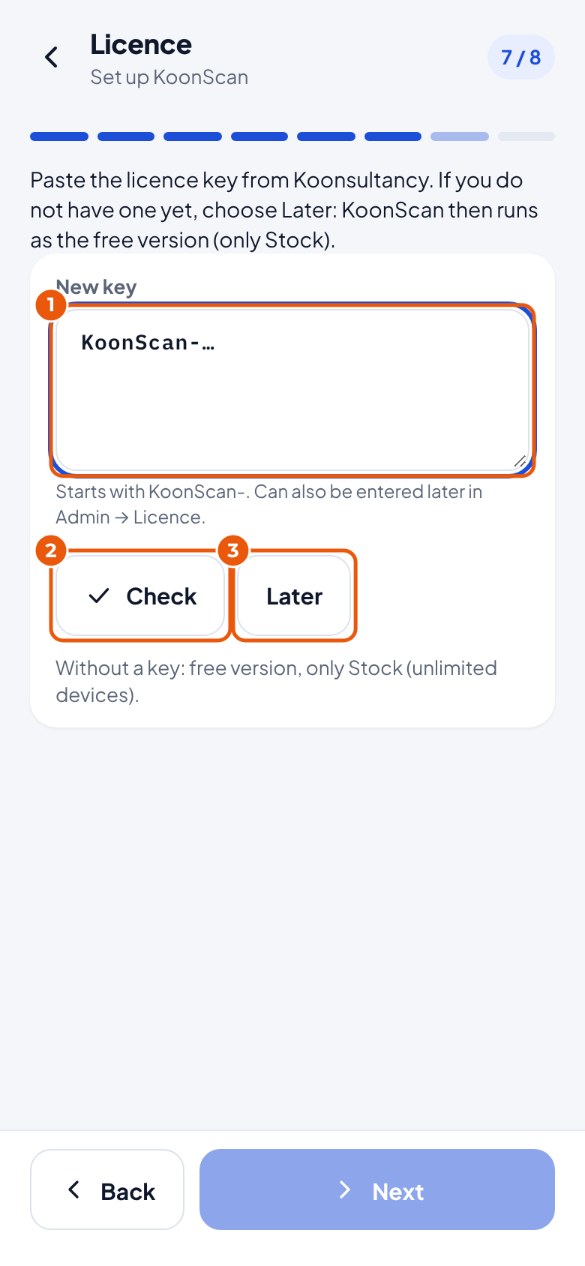
Step 7 · Licence#
- Do you have a licence key? Paste it in the box 1 (right-click → Paste).
- Click Check 2: you see who the key is for and until when. Then click Next.
- No key yet? Click Later 3. KoonScan then works as the free version (only Stock); you enter the key later (chapter 6).
Step 8 · Save#
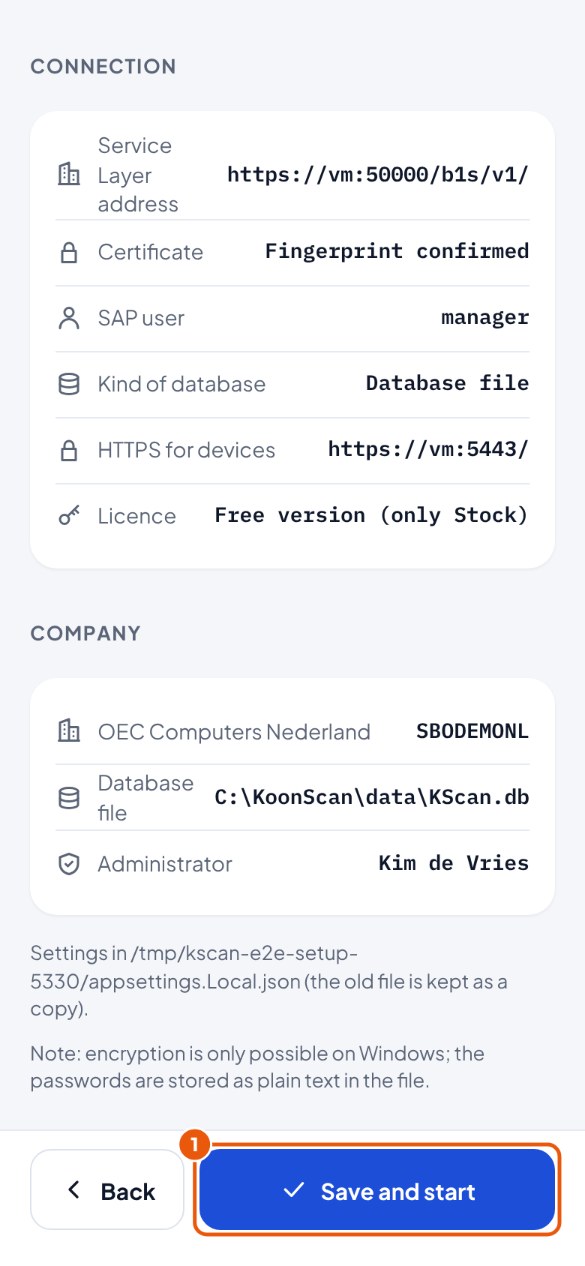
- Read the summary and click Save and start 1.
- Wait. It says "KoonScan is restarting". After about half a minute the login screen appears by itself.